
How did you integrate technologies - software, hardware and online - in this project ?
Pre-Production
Software
The software I used was blogger for my blogs. I also used word documents and google docs to write up any information and planning that needed to be done. I used final cut pro to edit my test shoot to give the group a rough idea of what to expect. I also used google slides to create presentations.


-----------------------------------------------------------------


Online
To create a blog I used blogger where I am able to post all my blogs with all my media information. To use blogger I created an account through my school email I then used a simple template that made it easy for me to navigate through. After I changed the template of the blog to fit my theme and I changed the privacy settings so that only I could see the blog. I adjusted the widths to fit any presentations or videos that I uploaded onto my blog. After setting all my settings I began to upload onto blogger. I used google docs as a backup to save my work. I did this by writing all my work on google docs before transferring it onto blogger. I used google to search for pictures that were relevant to posts, I then downloaded them onto my desktop and from there I went to blogger and used the upload file to access my pictures. Youtube was used to get videos that were relevant to the research I was doing. For example with my research into effects I used Youtube to look into professional make up effects. After watching these videos I then went to the share button and I copied the code then went to the blog and copied the code in the HTML view. I used google slides to create presentations of my mood boards and themes for the opening sequence.I opened google slides then choose a template that I liked and I used the text box tool and the insert image tool on various slides to create a presentation. During the lockdown I used teams as a way to contact my group to discuss the information about the sequence. I also used Youtube to upload this. I did this by using my school account on Youtube and then accessing the video file on Youtube and uploading it. After uploading it I clicked on share and copied the code into blogger which then embedded the video onto my blogger. To buy the props I needed I used Amazon as it offered quick delivery and I used google to search for the types of products I would need.
-----------------------------------------------------------------
Hardware
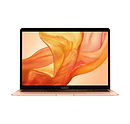
I used a Macbook Air to get the information I needed online. I also used it to save videos, files and pictures on my desktop. I also used my laptop to communicate with other members in my sequence and my teacher. My computer made it possible for the idea to be developed and for the initial ideas to be talked about. I also used my phone to communicate with my group through Whatsapp when we weren’t on teams.


Production
Hardware
On the day of filming I used a Black Magic 4k mini Ursa to film the sequence. I started off by setting the tripod up and then I placed the pan handle onto the right side of the tripod.The pan handle is used in either tilt or panning shots. I then got the camera and fixed it onto the Vinten tripod and then I bubbled the camera to make sure that it was at the right level. To make sure the camera is sat on the tripod properly there are two locks on the tripod that click once the camera is positioned properly.In different scenes the height of the tripod was changed through the clutches. Being able to change the height of the tripod is useful as it enables us to capture what I want to. The tripod had two sets of clutches that allowed me to either change the top half or bottom half of the tripod. After I placed the battery at the back of the camera and checked if it was charged. I checked the white balance and the exposure on the camera to check if it was correct before we started filming.The white balance was set to inside where the colours in the scene were brought out rather than the white balance being set outside where the colours wouldn't be seen. I then set the fluorescent lights and Kino Flo flights up in the studio which created bright lighting. I used my Iphone camera to take photos of the process we did on the day to use later on my blogs. We also used a monitor to show the character lying down on the table. During the sequence, we used the camera to shoot the first 10 minutes. It was then transferred onto the monitor to show the character lying on the table. The focus ring on the camera was used to focus on the main subjects in the scenes.To make sure that the camera was fully focused I zoomed in completely and then focused and then zoomed out to the area we were shooting. In some scenes I used the focus ring for a focus pull to reveal that the doctor was a clone. In this scene we can also see that the monitor is used to show that the clone is lying on the table.The microphone we used to capture sound was a Sennheiser Shotgun mic which was connected through a cable to the camera. The mic had a handle attached to it ensuring that the person who held it didn't interfere with the sound. The camera had a Lexar Pro memory card that allowed the camera to store the footage that would later on be transferred onto the computers.


Post production
Software
The app I used to edit the sequence was Adobe premiere pro. I started off by creating a bin where all the new footage would go.After that I started editing the action scene first where I removed all the audio. I then used the cutting tool and mark tool to place the footage all together in the timeline. The editing of the montage sequence came next and I cut the footage on a separate part of the timeline.To create quick flashes in the sequence I used the fade to white transition and I changed the time to 00:00:00:02 to make it appear faster. I then started to include titles into the sequence. I searched for a title that mirrored our sequence. I then typed out the titles and re-sized and placed them onto the sequence. Using the timeline I changed the duration so the audience is able to read it three times before it disappears. To get the original sound for the beginning of the sequence I went back to the log and by dragging or copying the sounds I wanted I placed them back onto the timeline and cut it to fit the sequence. I also imported ambient sound through the import section to make the location sound more realistic. After editing all the sound and titles I used the effects bar to do colour correction on some parts of the sequence to make it brighter. After doing the colour corrections I placed all the editing together to create a continuity sequence. Throughout this process I made sure to save my work constantly in case the computer crashed. While working on the timeline I used the ‘+’ and ‘-’ to zoom in and out of the timeline. I then exported it in the best quality onto the desktop.


Online
For the soundtrack I searched on youtube ‘Dark thriller sounds’ and then browsed through the various videos to see which one I thought would fit the sequence. I also used youtube to upload the sequence. To do this I went to the Youtube account I went to the import section and selected the video. After I waited for it to completely load and then gave it a title and then it was uploaded. To show the final product I went to Youtube and copied the code onto blogger and embedded into my blog.
Hardware
To edit the sequence I used a Mac pro 6 which had premier pro on it. To take pictures for my blog I used my iphone 11 and my Macbook Air was used to search for possible sounds that could be used in the sequence.
